
GORM 入门笔记(六)一对一关联(Belongs To 与 Has One)、初识预加载与关系操作
首先准备两个结构体:学生和老师
1 | type Student struct { |
然后自动建表
1 | func One2one() { |
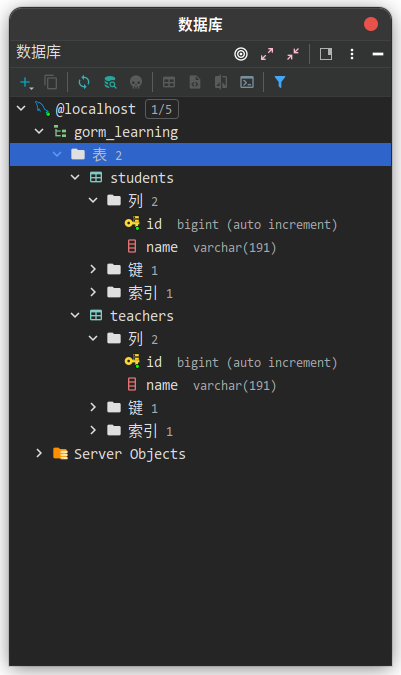
你会发现两张表都能被建出来,但是相互没有关联
下面来创建一对一关联
PS:Belongs To 和 Has One 在数据库是一样的,只是本地的代码结构不同
Belongs To(属于)
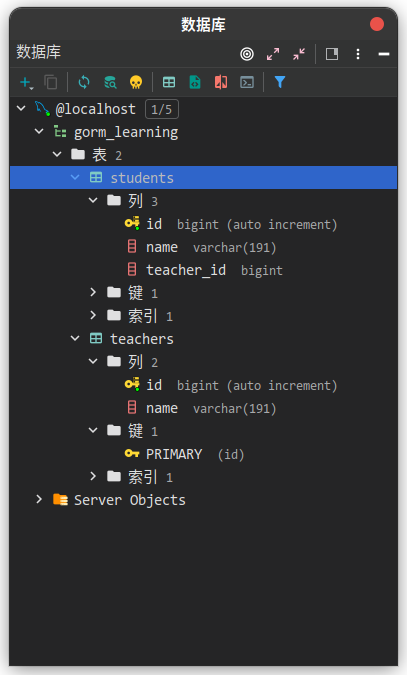
要说明某个学生属于某个老师,可以在 Student 中加上一个老师的 Id 和一个实例
1 | type Student struct { |
这时就只需要用 Student 来建表了,清空数据库并重新建表
1 | func One2one() { |

你可以看见, GORM 自动将学生和老师都建好了,并且学生有一个 teacher_id 来记录是哪个老师的学生
这就创建了属于关系
下面来构造并插入数据(注意主体,插入的是学生)
1 | // create a teacher |
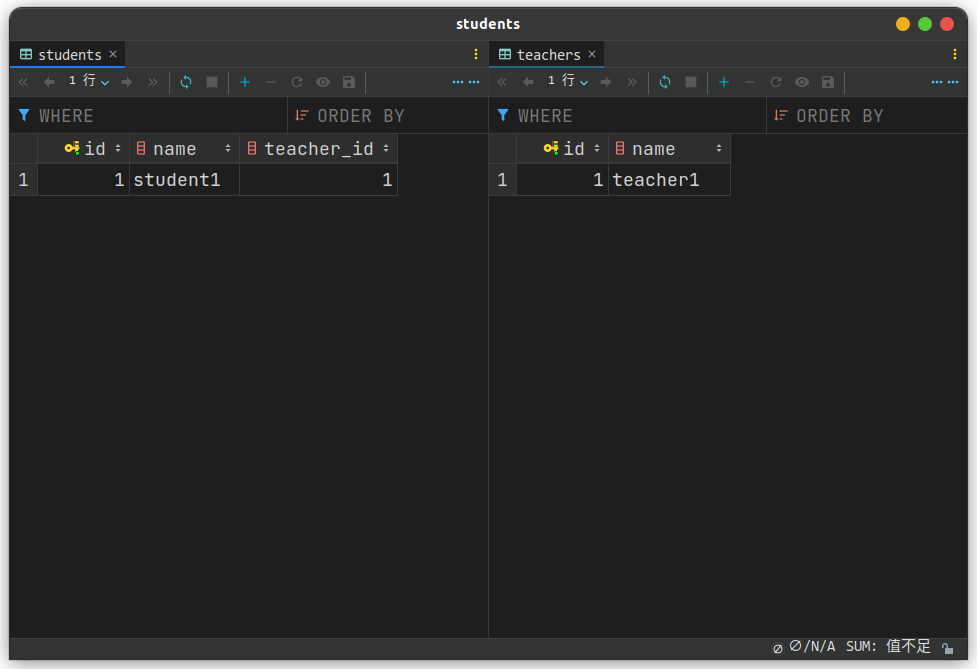
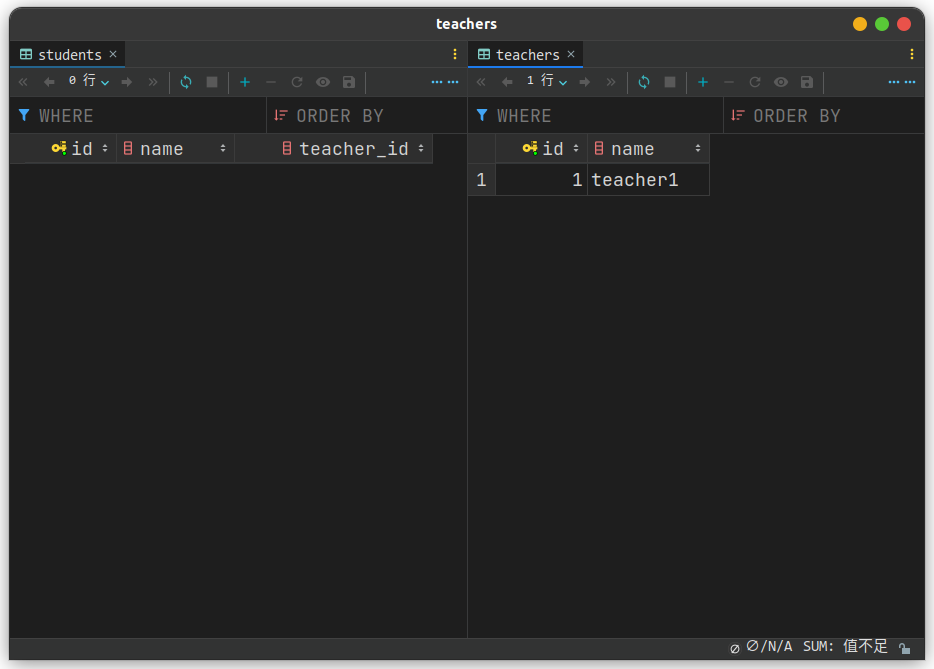
可以看见被成功地插入
Has One(拥有一个)
对应地,也有说明老师拥有一个学生的结构
1 | type Student struct { |
不同的是,现在需要传入两个结构建表
1 | GLOBAL_DB.AutoMigrate(&Teacher{}, &Student{}) |
现在先创建一个老师,这次尝试不指定学生
1 | teacher1 := Teacher{Name: "teacher1"} |
可见就只插入了一个老师
现在再准备一对师生
1 | // create student |
可以看见学生自动指向了老师
预加载
接下来讲查询
如果查询时要带出本身关联的其他结构的话,需要使用预加载
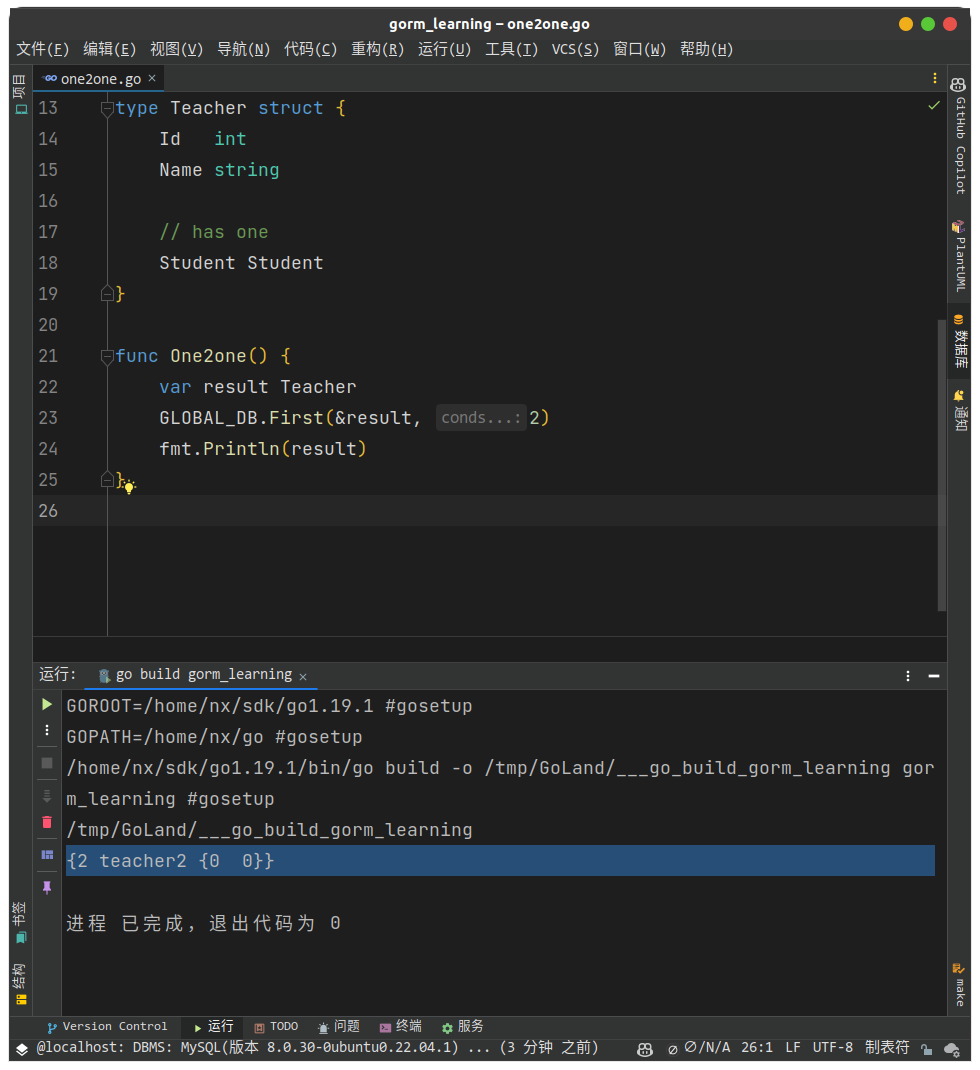
就接着上面的 has one 的例子,尝试查询刚才插入的那一对师生
1 | var result Teacher |
但是你会发现只能查到老师
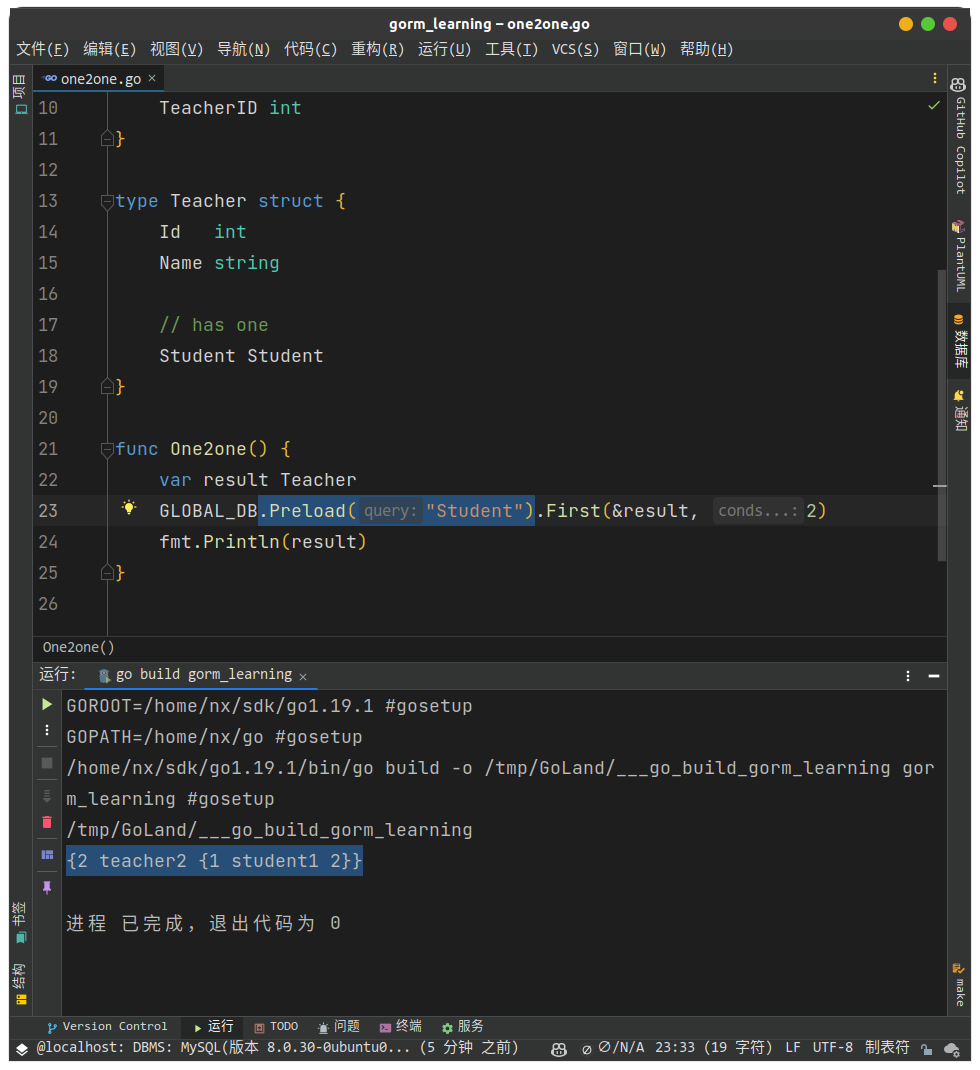
加上预加载方法 .Preload("Student") ,就能一并拿到学生
1 | var result Teacher |
只要是确立了关联,就能使用预加载,下面尝试使用 belongs to 关联
因为数据库上其实是一样的,就只用改本地代码
1 | type Student struct { |

这就是 has one 和 belongs to 的预加载查询
关系操作
上面在是在插入的时候成对插入的,插入时就有了关系
但是如果你在插入的时候只插入了一半,然后后面另一半是后来单独插入的,现在要手动把这个关系补上
或者想手动编辑或删除关系,就需要进行关系操作
创建 Append()
从上面的状态继续,但是现在只留一对师生,而且把他们的关系清除掉,尝试手动创建关系
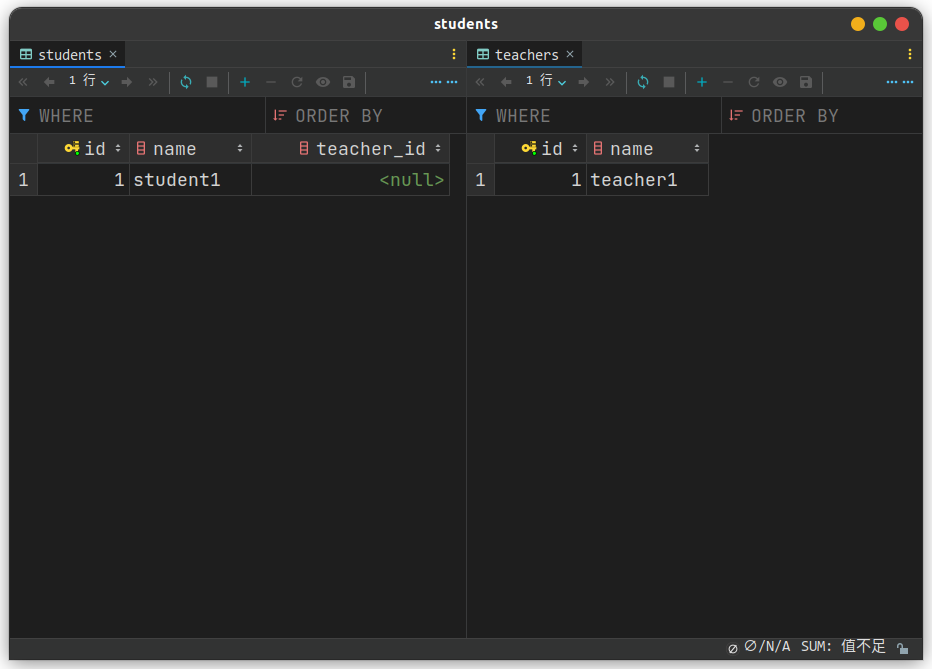
使用 Association() 方法即可,但是要搞清楚关系主体,这里是学生属于老师,所以 Model() 里面传的是学生
1 | s := Student{Id: 1} |
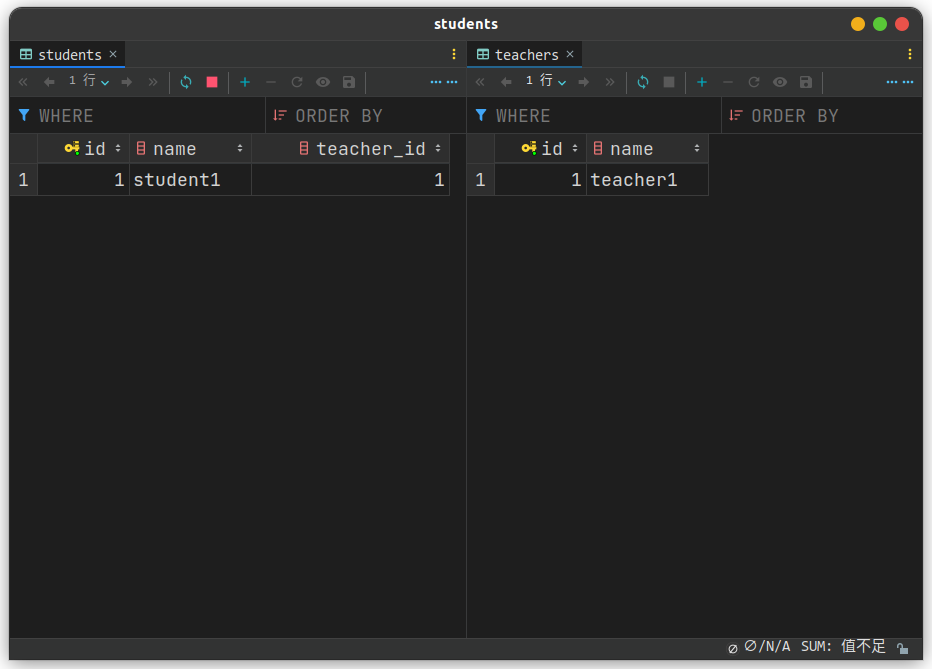
可见关系已经创建
替换 Replace()
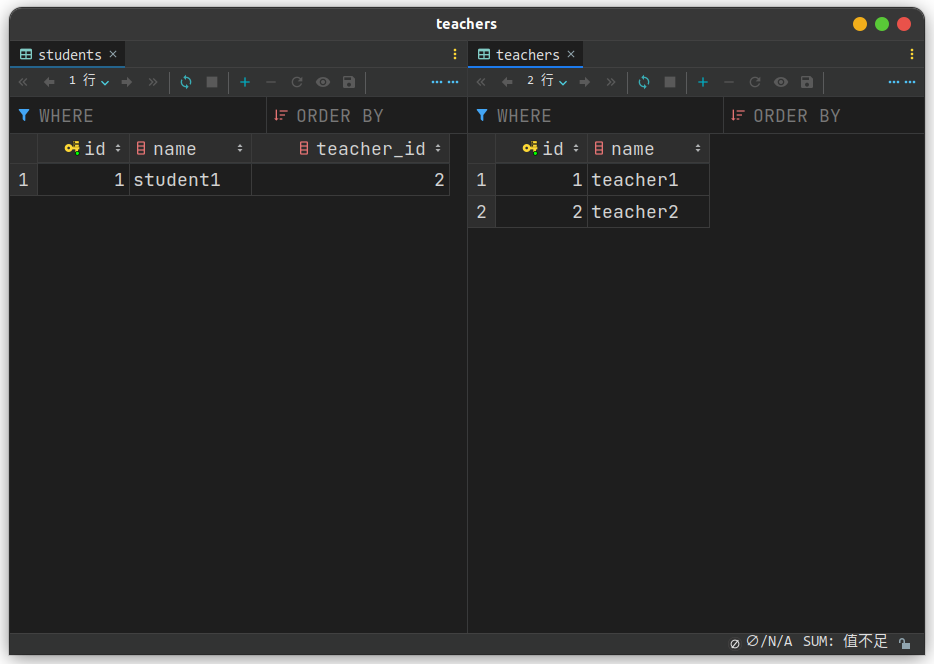
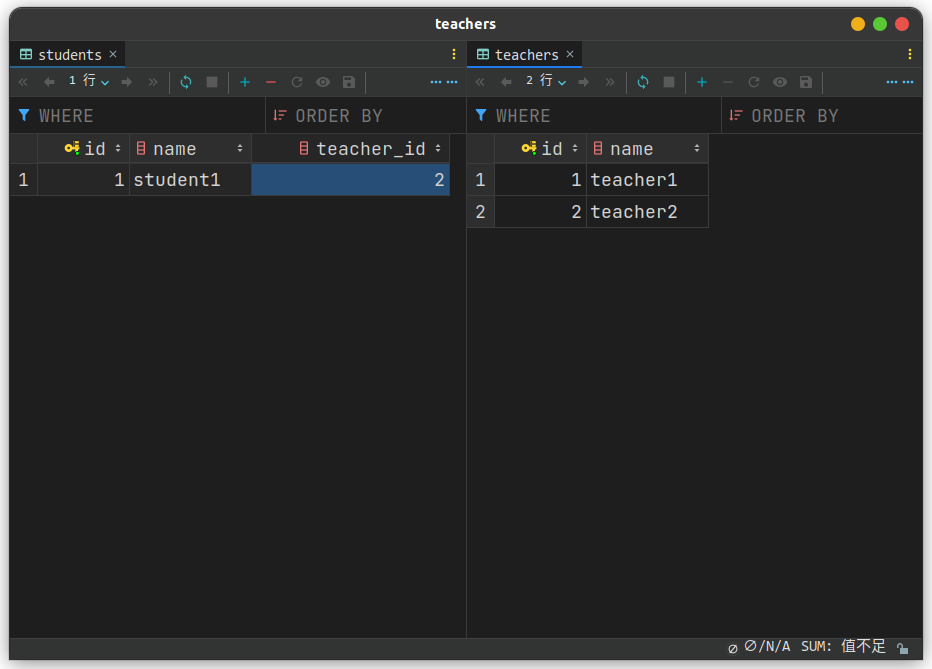
新加一个老师,然后尝试将关系替换为第二个

1 | GLOBAL_DB.Model(&Student{Id: 1}).Association("Teacher").Replace(&Teacher{Id: 2}) |
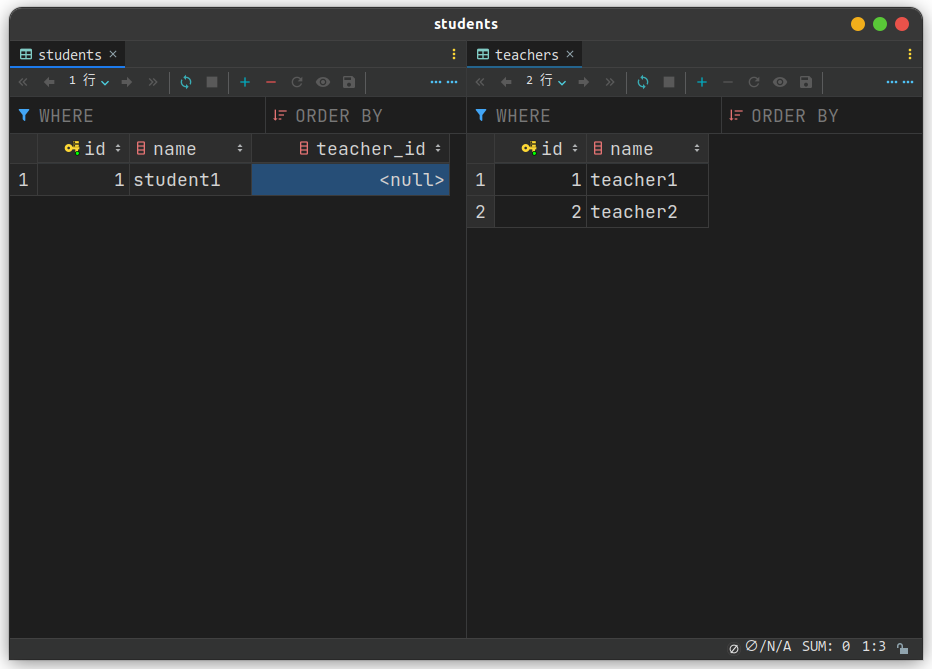
删除 Delete()
这个也很好理解
1 | GLOBAL_DB.Model(&Student{Id: 1}).Association("Teacher").Delete(&Teacher{Id: 2}) |
清空 Clear()
为什么有个删除还有个清空呢?因为后面还有一对多与多对多关系,删除一次只能删一个,清空可以全删了
计数 Count()
这个肯定也是放到后面讲了
小小的总结
你现在能说清楚 Belongs To 和 Has One 了嘛
A Belongs To B:
- 在 A 中有一个 B 的实例
- A 中有 B 的编号
B Has One A:
- 在 B 中有一个 A 的实例
- A 中有 B 的编号
其实只要 A 中有 B 的编号就已经建立关系了
里面的实例是为了插入/查询数据的时候方便,用一个结构体就行了
也就是说,这两个其实是一个东西,只是表达方式不同(看以谁为主语)